Flashing OS
There are two ways to flash the RK1 firmware - either more convenient flashing using BMC (but slower, about 90 minutes for the Ubuntu Desktop image) or by using a Linux PC or VM and the USB cable (it's similar to flashing CM4). The difference in flashing time comes from the link speeds. This article will cover both ways of flashing the firmware as well as putting the firmware on external drives.
Default login and password for the
Serverimage:login:
ubuntu
password:ubuntuThe
Desktopversion prompts for login and password during finishing up the setup
In this section:
- Known limitations
- Image types and download source
- Finishing up the setup of the Desktop image
- Flashing using Turing Pi 2 BMC (more convenient)
- Flashing using USB cable (faster)
- Post-install tasks
- Running off an external block device - prerequisites
- Running off an external block device - method 1
- Running off an external block device - method 2
Know Limitations
Currently, we know of the following limitations you might encounter while using RK1 and Ubuntu on RK1
- USB ports on Jetson Carrier boards are not supported in Ubuntu images yet - run
sudo apt updatefollowed bysudo apt -y upgradeand reboot to have USB working - DSI connector is not supported in Ubuntu builds yet - will be added later
- EDID (monitor resolution detection) does not work on the Turing Pi 2 v2.4 board correctly offering 1080p by default for all monitors - we're investigating this
- If you received your RK1 module before the official announcement (from the pool of initial 100 modules), HDMI might not work with some monitors while using a Jetson carrier board (and other Jetson-compatible carrier boards), however, HDMI will work on Turing Pi 2 board (can be fixed by adding 2 solder bridges)
Image types and download source
You always find the newest firmware version on https://firmware.turingpi.com/turing-rk1/
There are 3 image types available for RK1:
- Ubuntu 22.04 LTS Server based on the BSP Linux 5.10
- Ubuntu 22.04 LTS Desktop based on the BSP Linux 5.10
- [wip] Experimental Ubuntu 22.04 LTS Server based on the Mainline Kernel
The official and stable images are based on the BSP Linux 5.10. While the build is created by Joshua Riek and shared through his GitHub repository, the official image source for RK1 images is https://firmware.turingpi.com/turing-rk1/ which may and probably will differ from the images provided by Joshua. Joshua's images will also still work, but may not contain some features or may contain them later than the official download url.
Finishing up the setup of the Desktop image
Before you attempt installing the Desktop version of the image, it's good to know that once you finish flashing the Desktop image using one of the below methods, the first boot will require you to finish the setup using a keyboard, mouse, and monitor. If you do not finish the setup, SSH won't work because the hostname, the username, and the password are not set.
On Turing Pi 2 v2.4 boards you can use the USB_OTG port to connect a USB keyboard and mouse and the HDMI port to connect a monitor.
While the
USB_OTGport on a Turing Pi 2 v2.4 can be connected to any node, the HDMI port is always connected to Node 1 - use Node 1 for running a Desktop image.
On the Turing Pi 2 v2.5 board the
USB_OTGfunction has been moved from the USB A port to a new USB C port. The USB A port is now wired only to Node 1 to support a USB keyboard and mouse. To run a Desktop, use the USB A port and the HDMI port.
Most Mini PCIe USB controllers should also work with Ubuntu out of the box. We tested modules based on Renesas D720201 and D720202 chips.
Connect the USB mouse, keyboard, and HDMI screen and finish the setup once the flashing is done.
Flashing using Turing Pi 2 BMC
To use this feature you must update your BMC firmware to version 2.x
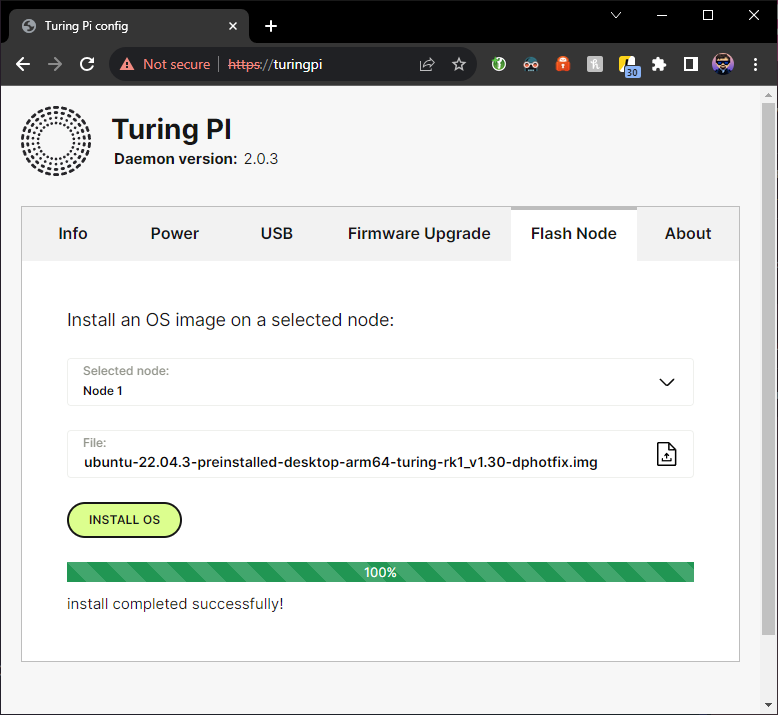
Navigate to BMC UI and to the Flash Node page:
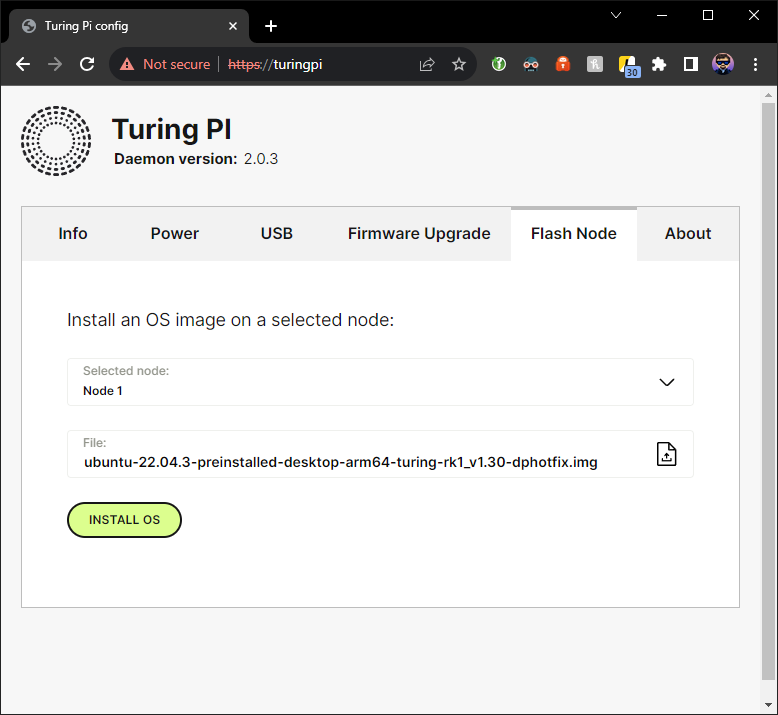
Choose the node to flash and choose the downloaded image, then proceed by clicking on "Install OS".
While flashing in Node 1 using USB cable can sometimes fail, flashing through BMC should always work
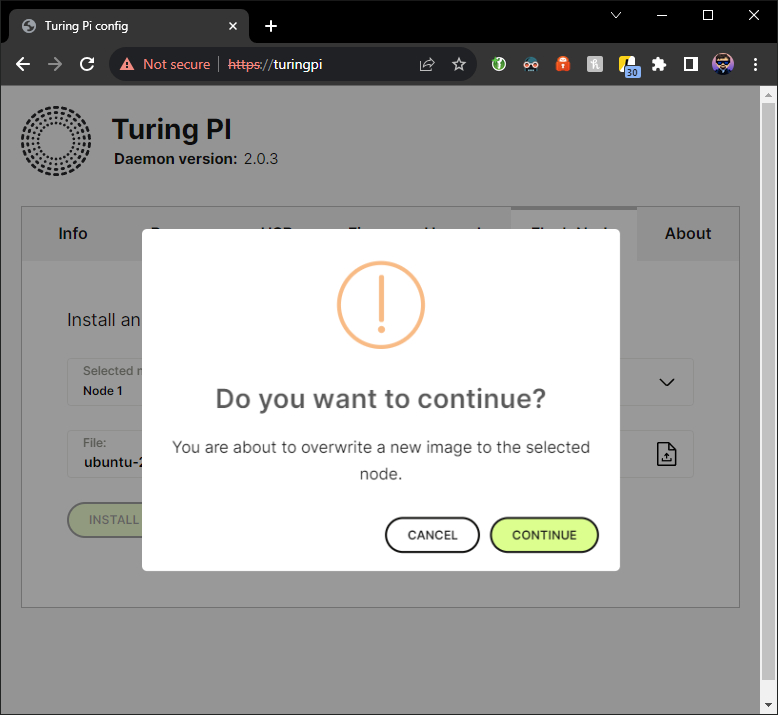
Confirm that you want to flash the firmware:
Flashing through the BMC takes about 8 minutes for each 1 GB of the image file, plus an additional minute at the end for verification. Currently, flashing the Server image will take approximately 60 minutes, and flashing of Desktop image approximately 90 minutes.
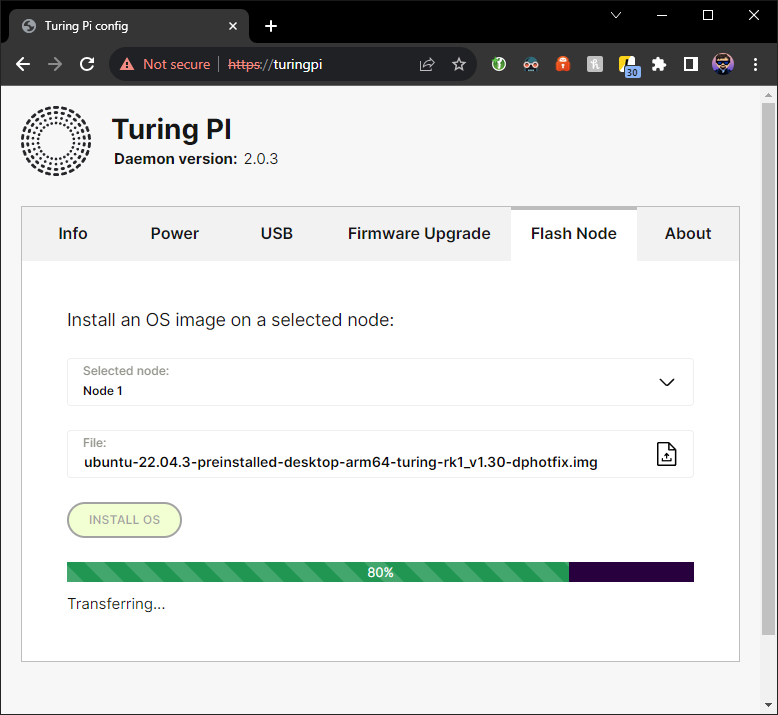
There is a known issue when the progress bar during flashing will reach 100% after approximately 2.5 minutes. This won't affect the flashing process, just the progress bar will not be updated correctly
During the flashing process, the progress bar will show the current progress:
Once flashing is done, a verification will be performed to make sure that the image flashed properly (should not take more than about 10 minutes, depending on the image size):
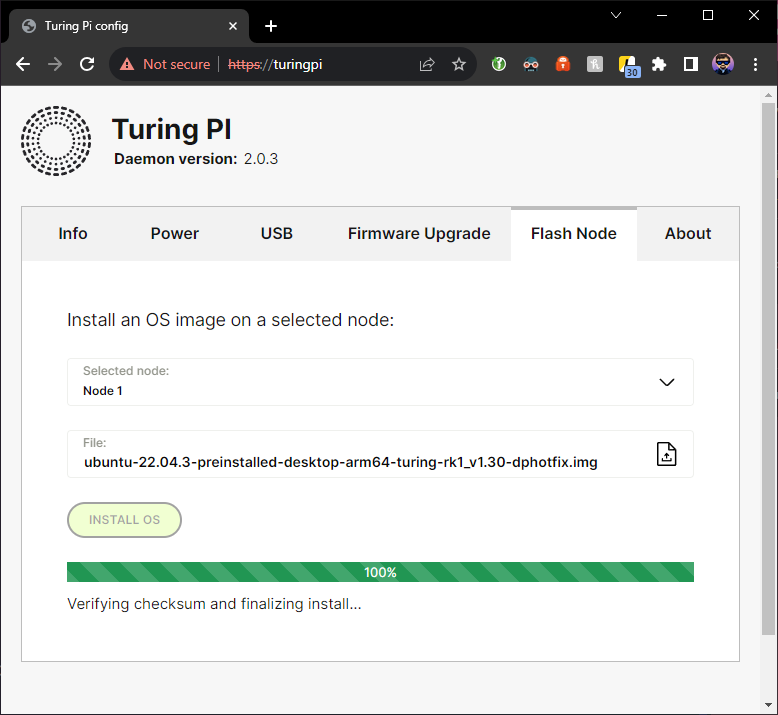
Once verification is done, a message indicating this will be shown and the module will reboot into the normal operational mode:
Flashing using USB cable
Preparation
To flash using a USB cable you'll need the flashing software.
Supported operating systems (please feel free propose an update when you successfully run this tool in other operating systems and provide steps to install it):
-
Ubuntu 22.04:
sudo apt update # install dependencies sudo apt -y install make g++ libudev-dev libusb-1.0-0-dev dh-autoreconf pkg-config libusb-1.0 git # clone repository git clone https://github.com/rockchip-linux/rkdeveloptool.git cd rkdeveloptool #hotfix a bug sed -i 's/snprintf(buffer, sizeof(buffer), "%s", chip);/snprintf(buffer, sizeof(buffer), "%.*s", static_cast<int>(sizeof(buffer) - 1), chip);/g' main.cpp # install aclocal autoreconf -i ./configure make sudo make install -
...
We also tested this way of flashing with VMs using VMWare Player - you can find more about how to install and prepare VMWare Player in the related section of Jetson module flashing, just install Ubuntu 22.04 LTS or another supported operating system from the list above.
Download the OS image file and MiniLoaderAll.bin file.
Flashing
Connect the Turing Pi 2 board to the computer:
- Turing Pi 2 v2.4 board - using the white USB-A port on the back called
USB_OTGwith a USB A-A cable - Turing Pi 2 v2.5 board - using the USB-C port on the back called
USB_OTGwith a USB A-C cable
To perform BMC-level operations you can either use BMC UI or
tpitool (either locally or through the SSH connection to the BMC). This article will cover both ways.
Flashing using USB on the Turing Pi 2 v2.4 board might not work in Node 1 on some of the boards. If you are experiencing this issue, move the module temporarily to another node, flash, and then move back.
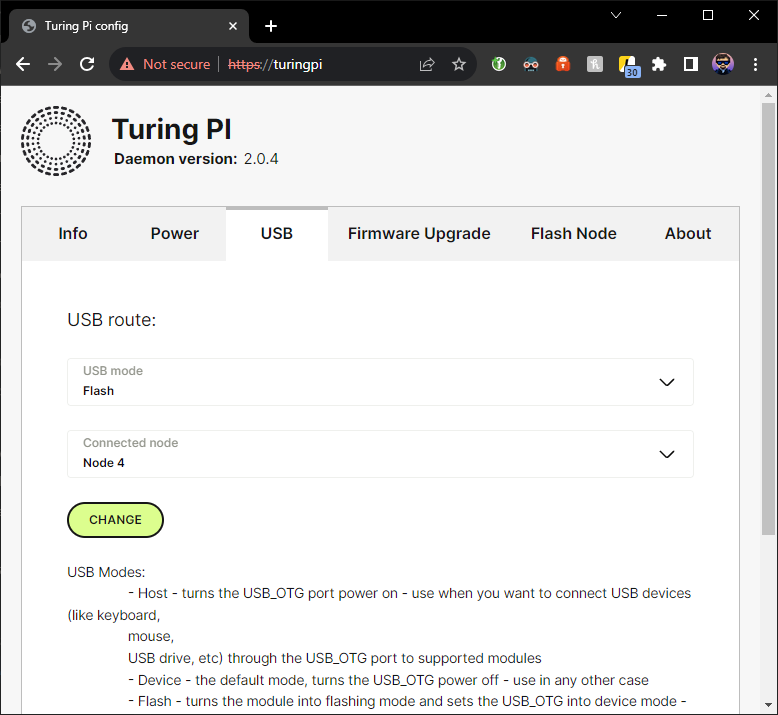
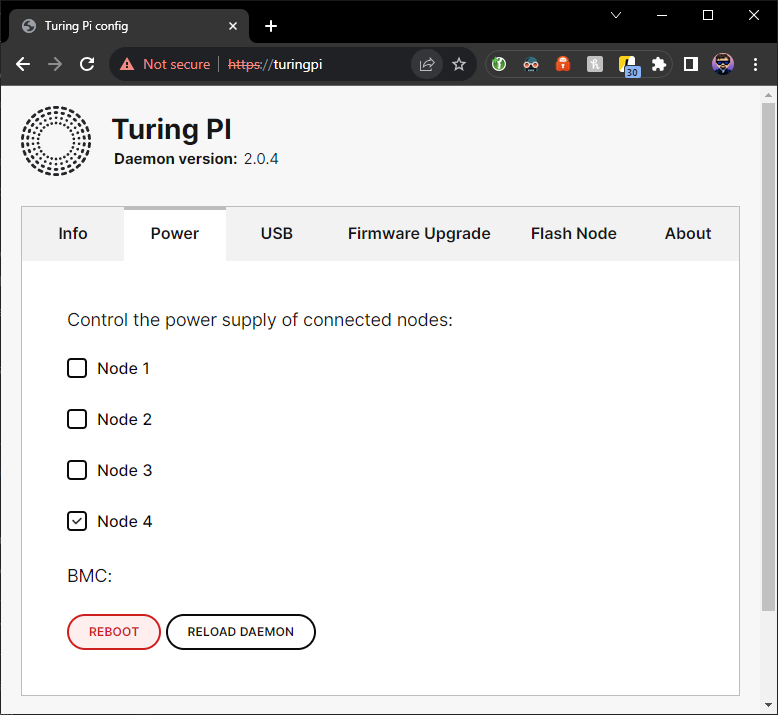
Make sure that the node power is off, set USB mode to Flash for the desired node number, and power the node on. We'll use Node 4 in this example.
BMC UI:
- Set USB mode:
- Power on the Node:
or using the tpi tool:
-
Set USB mode:
# tpi usb -n 4 flash
ok
where the number after -n parameter is the node number
-
Power on the node:
# tpi power -n 4 on
ok
The USB device will be exposed to the host system
If you are using VMWare Player to perform flashing, this is the moment when you may see a popup to choose what to do with the USB device - connect it to the virtual machine
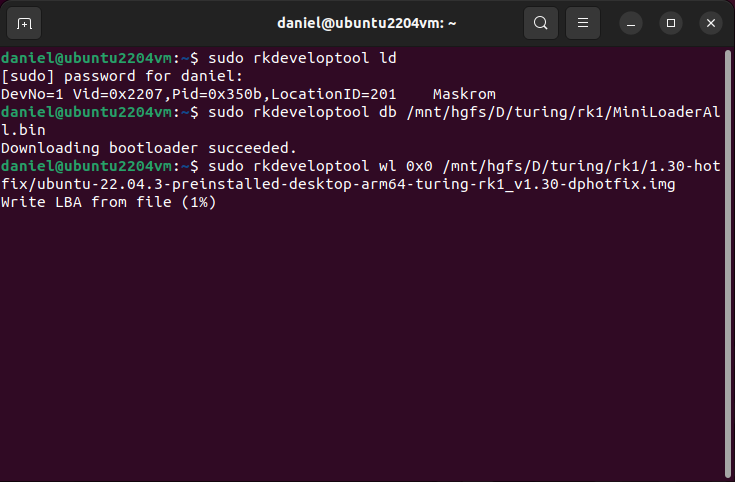
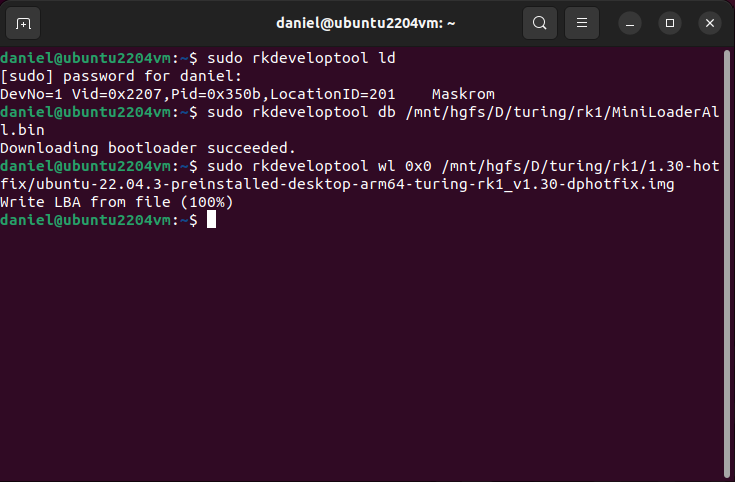
You can validate if the device is visible by executing on the host OS:
~$ sudo rkdeveloptool ld
DevNo=1	Vid=0x2207,Pid=0x350b,LocationID=201	Maskrom
If the device is visible, first upload loader:
~$ sudo rkdeveloptool db /path/to/MiniLoaderAll.bin
Downloading bootloader succeeded.
If you are using VMWare Player to perform flashing, this is the second moment when you may see a popup to choose what to do with the USB device - connect it to the virtual machine (uploaded loader cause USB id to change)
Then the module is ready for flashing:
~$ sudo rkdeveloptool wl 0x0 /path/to/ubuntu.img
Write LBA from file (0%)
Flashing this way takes about 15 minutes for the Desktop image and about 10 minutes for the Server image.
Once the progress achieves 100%, the flashing is done.
Examples of the flashing process in Ubuntu 22.04:
Change the USB mode back to Device and restart the node:
BMC UI:

tpi tool:
# tpi usb -n 4 device
ok
# tpi power -n 4 reset
ok
The module will boot and operate normally. If you flashed the Desktop image, remember to finish the setup.
For the
Serverimage version, the default login isubuntuand the default passwordubuntu(you'll be prompted to change password on first login). TheDesktopversion asks you to create the account during finishing setup
Post-install tasks
Update the OS
This is always good to update the system after installation not only to get the latest security patches, but there may also be updates containing features and fixes that have been released between the full OS release:
sudo apt update
sudo apt -y upgrade
CPU governor
Because of different performance issues, the cpufreq governor is set to performacne, which means the CPU works with the max frequency all the time. This may be the problem when you're using desktop and will look like a lag or delay, but if this is not a problem for you or you are using the server image, ondemand will lower the CPU temperatures and may even raise the performance by a little bit.
To change the governor to ondemand run:
echo ondemand | sudo tee /sys/bus/cpu/devices/cpu*/cpufreq/scaling_governor
And to put it back to performance:
echo performance | sudo tee /sys/bus/cpu/devices/cpu*/cpufreq/scaling_governor
The governor will get reset on system restart. If you want to persist the change, run:
nano /usr/lib/systemd/system/cpu-governor-performance.service
And edit the command to contain governor of your choice, then save and exit (press F3, then F2)
Running off an external block device - prerequisites
You can also run the image off an external block device:
- NVMe - supported on each node
- SATA - supported on Node 3 through the built-in SATA ports, or in Nodes 1 and 2 through PCIe to SATA controllers (ASM106x-based are proven to work)
- USB - supported on Node 4 through the built-in USB 3.0 (blue) ports, or in Nodes 1 and 2 through PCIe to SATA controllers (list of proven devices must be confirmed, but controllers based on Reneseas D720201 and D720202 chips should work)
While you can boot off an external block device instead of included eMMC, the bootloader must still be flashed to eMMC because RK3588 SoM does not boot off devices like this and the bootloader is what handles this part of the boot process. Currently, the easiest way to put a bootloader is to flash the image onto eMMC too, but we should have "just bootloader" images for this purpose in the future
The boot order:
- NVMe
- SATA
- USB
- eMMC
Running off an external block device - method 1
The first method to prepare the external device is to just flash it with the image using a computer. This applies to the situation when you can connect the device to your computer first. USB devices are obvious target for this method, but if you have an easy way to connect SATA drive (through eSATA port, SATA port, SATA enclosure) or NVMe drive (NVMe USB enclosure, directly on the motherboard), you can use this method too.
On Windows, Linux and MacOS you can use Balena Etcher - select the image, select the desired disk and press Flash:
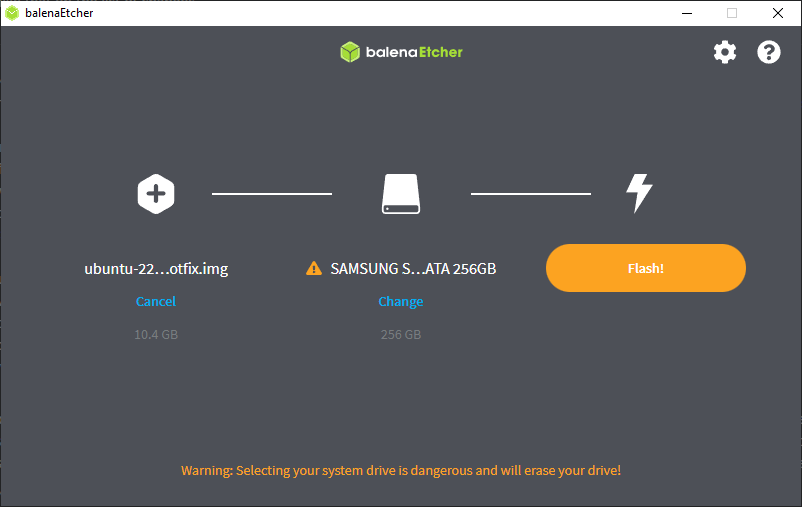
Double check if you are choosing the right disk
On Linux and MacOS you can also use lsblk to locate the drive and dd to flash the image - run lsblk to list the drives, connect the desired drive and run lsblk again to see which device appeared and remember the device name (must be disk device, not partition device), sde in this example:
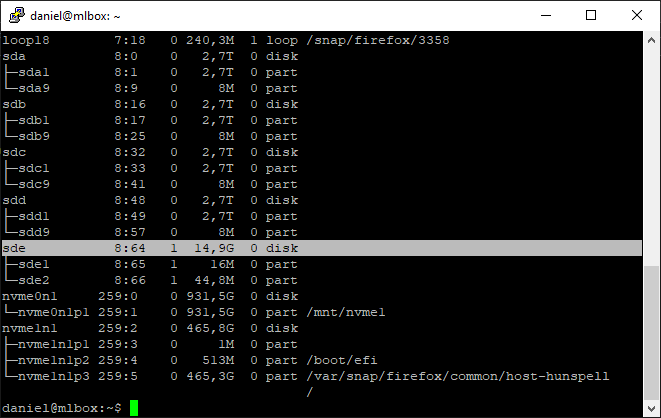
Then use dd to flash the image:
sudo dd if=path/to//ubuntu.img of=/dev/disk_device bs=1M
For example (using sde):
sudo dd if=ubuntu-22.04.3-preinstalled-desktop-arm64-turing-rk1_v1.30-dphotfix.img of=/dev/sde bs=1M
After finishing flashing remove the drive and connect it to the right connector of the Turing Pi 2 board (related to the node you want to use the drive with).
Running off an external block device - method 2
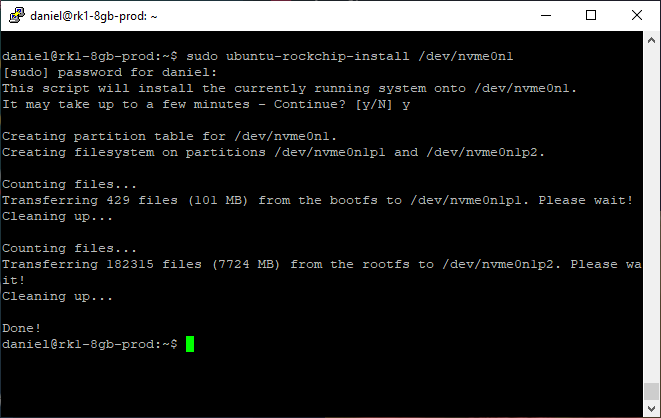
If you cannot flash the block device directly, you can copy the running eMMC installation of the firmware on the external block device using the command:
sudo ubuntu-rockchip-install /dev/disk_device
For example, for NVMe drive:
sudo ubuntu-rockchip-install /dev/nvme0n1
For example SATA device:
sudo ubuntu-rockchip-install /dev/sda
Use lsblk command to examine connected drives and use the one of your choice.
This will copy the currently running Ubuntu from eMMC to the device of your choice. When the command ends - reboot, Ubuntu will start from the external block device.
Updated 6 months ago